


So it’s taken 4 weeks, countless cups of coffee, the occasional bicker and a whole lot of team work from two total diy novices (our resume before this consisted of painting, panelling & occasionally hanging mirrors, whilst hiding mishap holes with said mirrors) to turn a once univiting mismatched area of the living room into something truly special to us! I am so excited to finally be able to share the outcome of my vision (and Tims hard work), which originally started with an oversized ornate fire surround, with you all.
FROM THE BEGINNING
From I think day one of getting the keys, my wonderful Mum has said “what this square room needs is a focal point” and you know what they say “mother knows best”. I mean we have tried to create our own focal points over the past two years with mirrors, the tv and furniture we already had, but nothing we ever did looked quite right (it doesn’t help that the pieces we were working with were from our previous open plan home & therefore too chunky for the space). Occasionally I would search for fireplaces/ surrounds but nothing was ever truly ‘me’, however back in February, thanks to the power of Instagram, I spotted my first ornate Louis fire surround and the rest was history!

Initially we didn’t intend on building a chimney breast (I had visions of mirrored glass behind the surround & lots of twinkling candles in front) however after living with said surround for several weeks we came to the conclusion that what the space was still lacking was depth and so our diy journey began!
BUILDING THE CHIMNEY BREAST
To create the stud chimney breast (after making all initial measurements etc) we first used two lengths of CLS (cut to size) and secured them to the main wall using large frame fixings from Wickes (this created the width of the chimney breast). We then cut another two pieces of CLS which we secured slightly further forward (this is what created the depth) using several smaller pieces of CLS which had been secured to the back pieces (apologies if I’m not the greatest at describing this but hopefully the pictures will do the talking).
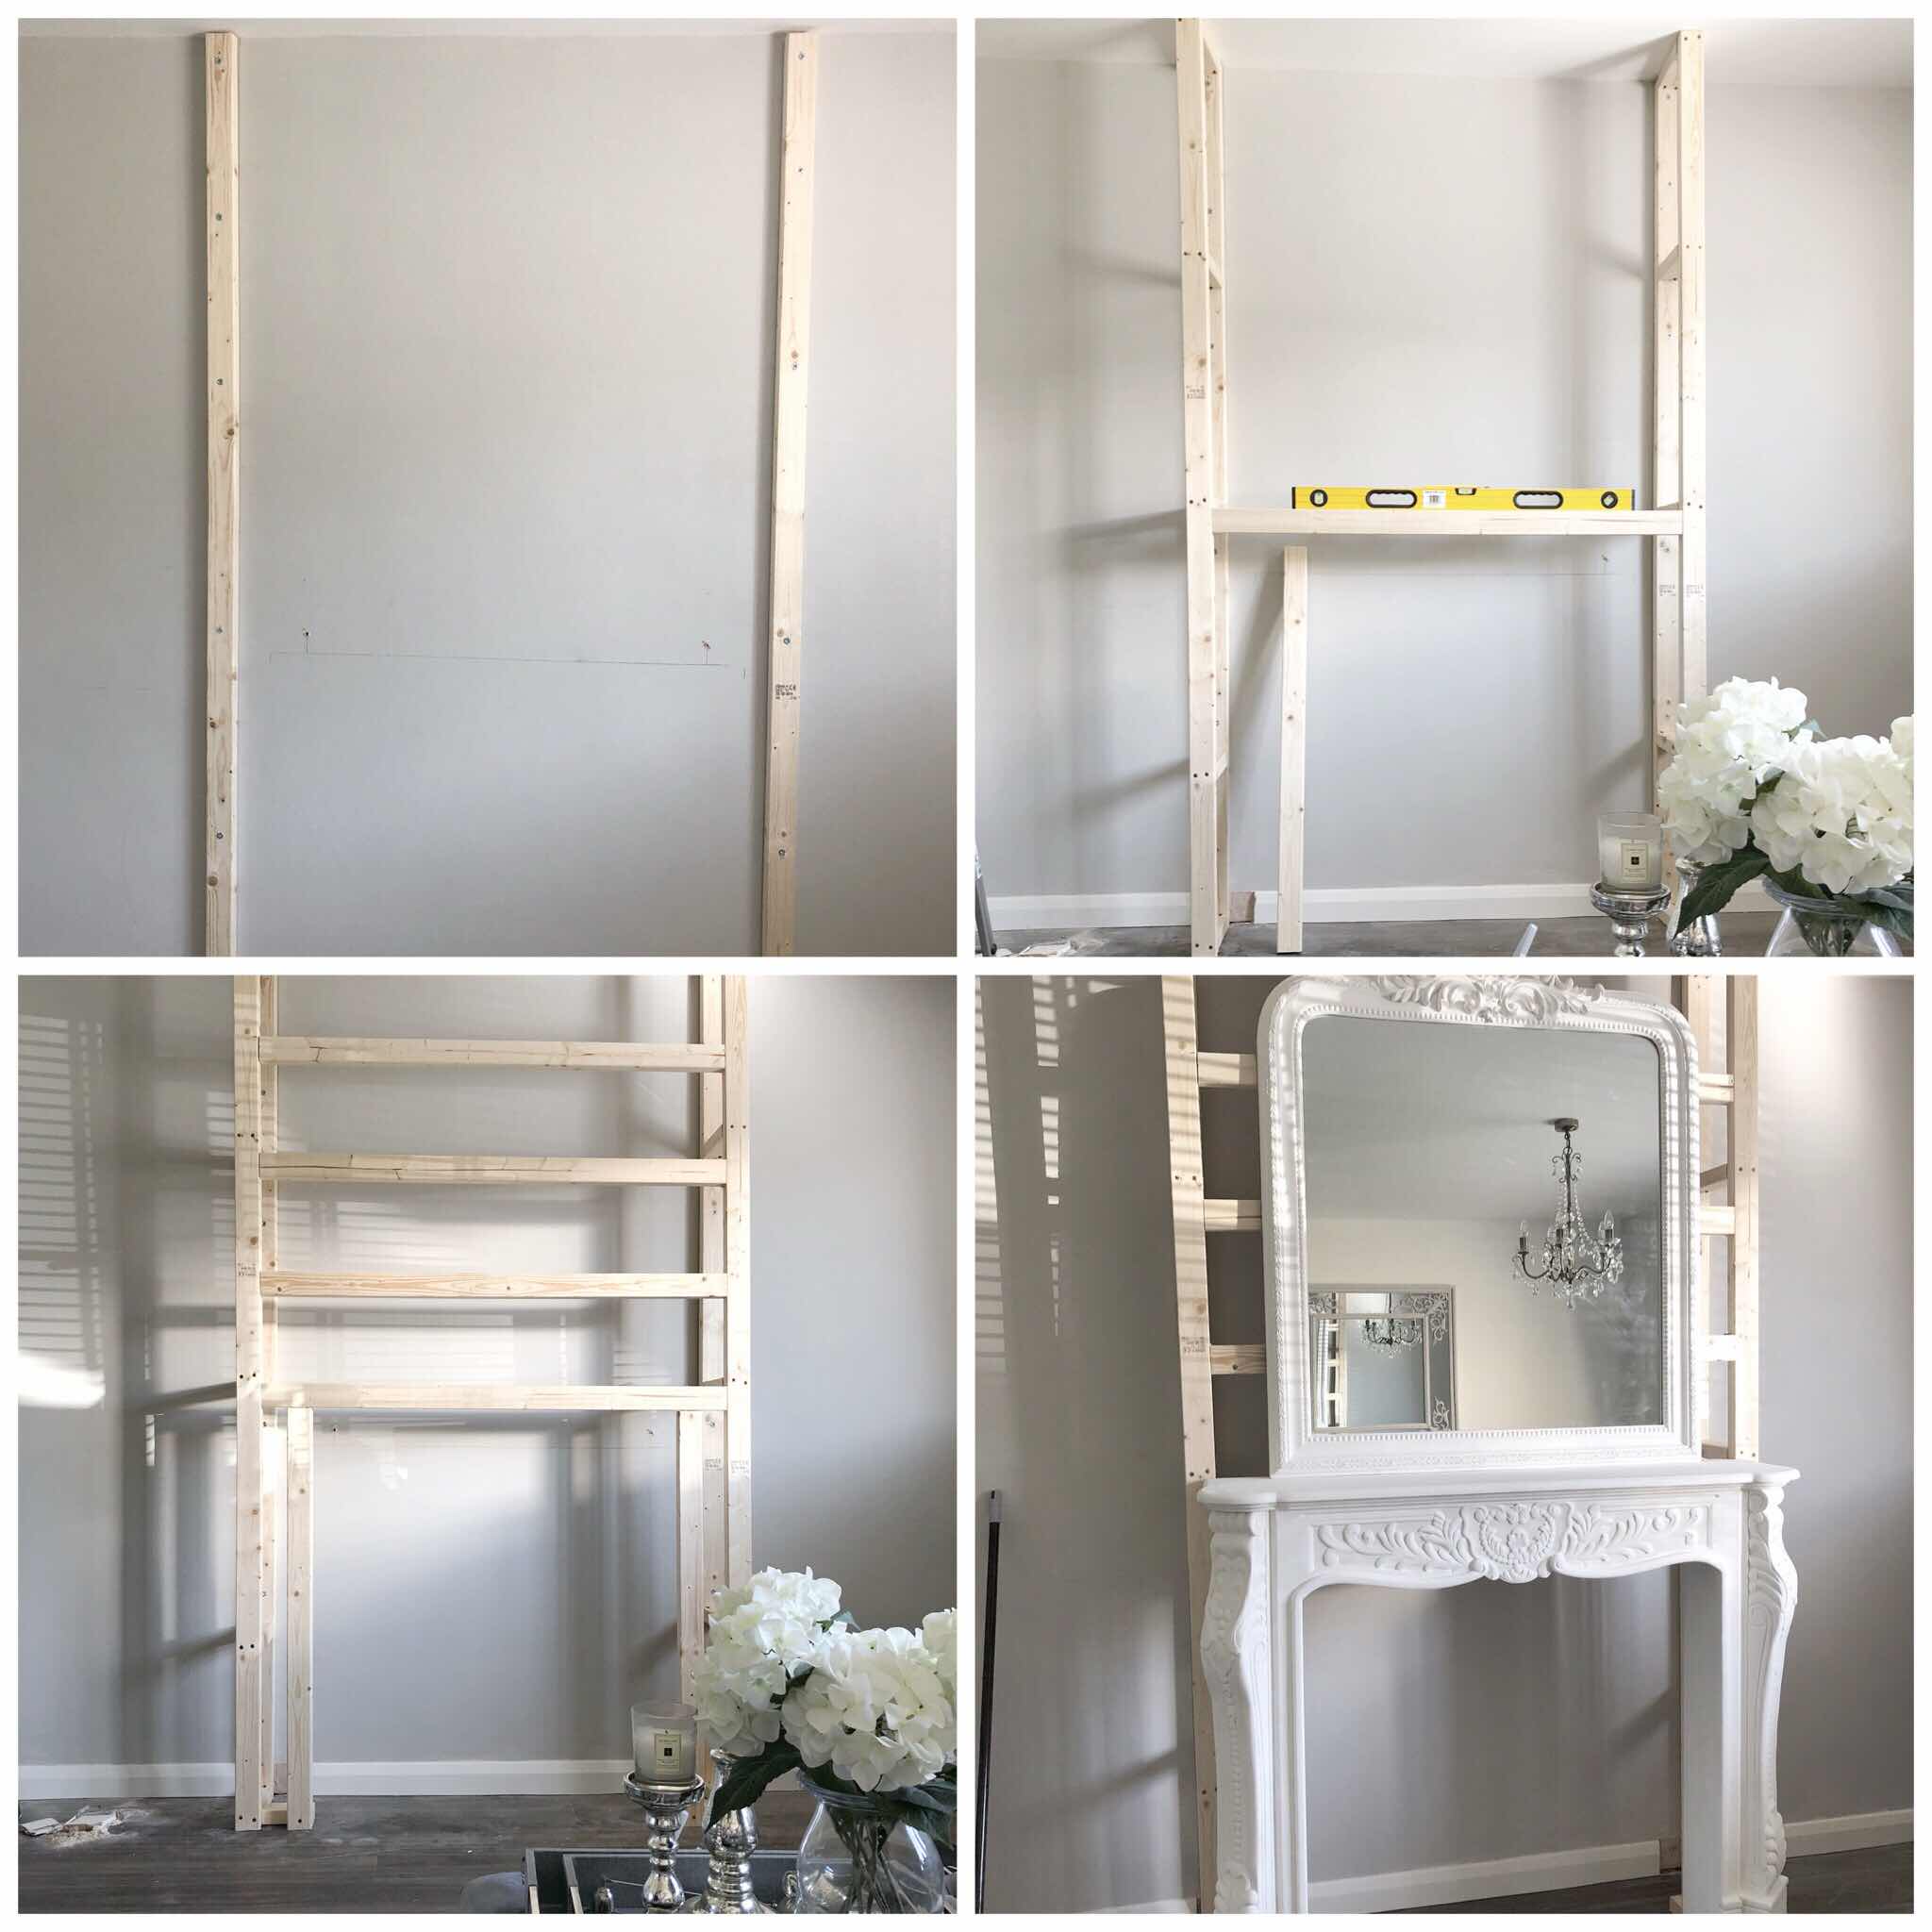
We then did something similar in the front to create the opening of the fire and worked our way up to ensure that we had a solid frame, which we then boxed in using cut to size Mdf, secured with panel pins. Unfortunately this is where we faced our first hurdle! Due to the fire surround being so oversized we needed to use two pieces of mdf in the front which created a rather lovely join! As a result rather than just painting over the boards like initially intended, we inlisted the help of my ever patient Dad who secured metal trims around the chimney breast (to secure the edges) which he then later plastered over. For those wondering we later sanded down and painted the walls in Farrow & Ball Ammonite.

THE HEARTH
So here is where we saved the most amount of money. After falling in love with a £600 marble Carrara hearth, my Dad suggested building our own for a fraction of the price.
To create the hearth we used chipboard cut to size (I think we paid about £8 for this), ready mixed adhesive & grout from Wickes (this was about £30 altogether) and 6 Misty Fjord Herringbone Marble Carrara tiles from Toppstiles (I think I paid about £80 in total for these). I have to admit that this was probably one of the most time consuming parts, however this was down to the design I chose as we had to cut each remaining tile in hearth to create a square edge (as seen in the photos).

Initially we were going to just paint the wall at the back of the chimney, however, after what felt like our hundredth trip to Wickes we came across the split Carrara tiles (these have the most beautiful sparkle to them) and the rest we shall say was history. To tie the two tiles together we created the lip of the hearth using cut offs from the back tile.
PANELLING
Thanks to my dear friend Lee Sherrington and her wonderful hubbys expert advise we have become dab hands at panelling. after falling hook, line & sinker for what we have created in the hallway (post on how we did it to follow), I knew I wanted to do something similar in here. I really do think the panelling has added the ultimate wow factor as it’s given the illusion that the walls are not only wider but taller.

FINISHING TOUCHES
Now to my favourite part, the finishing touches. So above the mantle we decided to place this beautiful ornate mirror from Brissi which compliments the detailing on the surround perfectly. For the time being I have scattered a few Jo Malone candles on the mantle (hopefully I can add a few more very soon) and within the fire I’ve popped a cast iron log basket from B&Q.

I cannot tell you how pleased I am with the results. As I lovingly stare at this space whilst waffling away I almost have to pinch myself. The once univiting space is no more & everything seems to have just blended together. Also before I stop boring you all (congratulations if you’ve got this far), I just have to mention for those concerned that we do have a tv we are just awaiting the unit!!


No comments